Sunday, September 16, 2012

Caramel Apple Cupcakes

Now just to clarify a thing before getting into this recipe. It doesn't taste very much like a caramel apple. It is more of an apple pie type cupcake with an old fashioned caramel frosting. It is absolutely delicious...and if I didn't have to share them I probably would have eaten all of these myself. Honestly I had a hard time of not eating all of the batter before actually getting it into the oven.

Fresh Apple Cupcakes
Yields 12 cupcakes

INGREDIENTS
1/4 cup butter, melted
1/2 cup granulated sugar
1/2 cup firmly packed dark brown sugar
1 large egg
1/2 tsp vanilla extract
1 cup all purpose flour
1/2 tsp baking soda
1/2 tsp salt
1 tsp cinnamon
2 large granny smith apples (peeled and chopped)

DIRECTIONS
  1. Preheat your oven to 350F. Line your cupcake tin with liners and spray them with nonstick spray.
  2. Stir together first 5 ingredents in a large bowl until blended.
  3. Combin flour and the next 3 ingredients together. Add to the butter mixture stiring until combined. Stir in the apple. It will look like there isn't much batter but you should have just enough if you don't eat half of it before you bake it.
  4. Spoon your batter into liners 2/3rds full and bake for 12-15 minutes or until a toothpick comes out clean.
  5. Allow cupcakes to cool in the tin for 10 minutes and then remove and allow them to finished cooling completely on a wire rack.
Old Fashioned Caramel Frosting

INGREDIENTS
1/2 cup butter
1/2 of a 16oz package of brown sugar
1/4 cup evaporated milk
1/8 tsp baking soda
1/2 tbsp light corn syrup
2 cups of powdered sugar

DIRECTIONS
  1. Melt the butter in a saucepan over medium heat. Add the brown sugar and bring to a boil, constantly stirring. Stir in evaporated milk, baking soda, and corn syrup. Bring to a boil once more. Remove from heat and allow to completely cool. This takes about 1 hour.
  2. Transfer caramel mixture to a mixer bowl. Gradually beat in the powdered sugar at medium speed until light and fluffy. 
Viola! Pipe your frosting on your cooled cupcakes and decorate however you want. I was going to put little crab apples on top of mine....but they're really bitter....they're edible but I didn't want to risk the chance of someone straight up biting into that crab apple and hating me fore it.

Raspberry Lemonade

Since summer was winding down I felt the need to make a cupcake to capture the refreshing feeling that summer brings so many people. I decided that I would make some sort of lemonade type cupcake. I few weeks prior to this experiement I was walking around downtown Saint Petersburg, FL, where I live and walked into a local cupcake shop. This is a habit of mine since I want to own a shop myself one day. When I walked in I purchased a Pink Lemonade cupcake and was sadly dissapointed when I ate it :(. It tasted like a pink cupcake...not a pink lemonade cupcake....all I could taste was vanilla and food coloring....which for those of you that dont know...too much coloring makes food incredibly bitter.

So with that in mind I went home and told myself....I can so do better. It actually took me 2 tries to get this cupcake right. I tried making a buttermilk based cupcake first....I hated it. For some reason I can just taste the bitterness of the buttermilk no matter what I put it in. So I nixed that idea and came up with the recipe I am about to share with you all :D
Raspberry Lemonade Cupcakes
Yields 12 cupcakes

INGREDIENTS
1 cup all-purpose flour
1/2 tsp baking powder
1/4 tsp baking soda
a pinch of salt
1/2 cup granulated sugar
1/4 cup vegetable oil
1 whole egg
1/3 cup thawed raspberry lemonade concentrate (you can use whatever lemonade you want)
1/4 cup whole milk
pink food coloring (if you use gel you don't need a lot...i used a smidgen and it was uber bright!)

DIRECTIONS
  1. Preheat your oven to 350F. Line your cupcake tin with your liners and spray with a flour based cooking spray to keep your cupcakes looking nice.
  2. In your mixer bowl whisk together your sugar, oil, egg and lemonade concentrate.
  3. In a seperate bowl mix together the flour, baking powder, baking soda, and salt.
  4. Add the flour mixture and the milk in 3rds starting and ending with flour (flour, milk, flour, milk, and flour) Mix until just combined.
  5. Add your food coloring and mix until evenly colored.
  6. Fill your cupcake liners 2/3rds full and bake in the oven until the tops of the cupcakes spring back when touched and a toothpick inserted comes out clean. 
  7. Allow to cool in the pan for 10 minutes then remove the cupcakes to completely cool on a wire rack.
Raspberry Lemonade Frosting
INGREDIENTS
3 cups confectioners sugar (you can use more if you need to)
1 stick of unsalted butter at room temperature
1/8 tsp of salt
2 tbsp thawed raspberry lemonade concentrate (use more if you want a stronger flavor)
pink food coloring

DIRECTIONS
  1. Beat together the butter, salt and concentrate until creamy.
  2. Slowly add in your powdered sugar until you get the consistency you would like.
  3. Add in your food coloring until you achieve the desired color.
That's all there is too it! All that's left to do is pipe on that frosting and enjoy!

Blog Neglect!!!

Alright. Let's take a second to acknowledge the fact that I neglect my poor blog like whoa. I feel like a bad parent. I don't even know how this happens! One minute I'm telling myself lets get this blog up to date and the next minute I'm like "WAHHHHHHH I HAVE TO MUCH HOMEWORK" -facepalm-

I have absolutely no idea how Julie managed to cook recipes from Julia Child and blog about it on a daily basis but I applaud her for it. Now that my first quarter of culinary school is winding down I find myself with no homework (for now...I'm sure my work load will become insane again after my 1 week break) and a bit more free time. Mind you...I still bake once a week. That never changed. I just haven't gotten around to writing about it.

So. For the next few days I will be attempting to catch this blog up with the cupcakes that I have made over my weeks of absence....as well as updating it with the cupcake that I made this week. I will keep my fingers crossed that I will be able to manage this.

Tuesday, August 7, 2012

Chocolate Chip Cookie Cupcakes

Who doesn't love warm gooey chocolate chip cookies straight from the oven. I mean seriously. They are just delightful. There is almost nothing better than a warm cookie...except...maybe..... How about a chocolate chip cookie cupcake stuffed with eggless cookie dough? I'm going to say yes. Heaven in my mouth. And after a hard day of studying for my midterm this cookie cake seriously hit the spot.

So I've been thinking about these cupcakes for a while now. I figured chocolate chip cookies are primarily brown sugar right? So why not make a brown sugar based cupcake with chocolate chips in it. Declious!

Chocolate Chip Cookie Cupcake

INGREDIENTS
1 1/2 sticks unsalted butter, at room temperature
1 1/4 cup packed light brown sugar
2 large eggs
1 1/3 cup all purpose flour
1/2 tsp baking soda
1/2 tsp baking powder
1/8 tsp salt
1/2 cup whole milk
1 tsp vanilla extract
1/2 cup chocolate chips

DIRECTIONS
  1. Preheat your oven to 350F. Line your cupcake tin like always.
  2. In the bowl of a stand mixer beat together the butter and brown sugar until nice and fluffy.
  3. In a separate bowl sift together the flour, baking soda, baking powder and salt. 
  4.  Once your sugar and butter is nice and fluffy add in your eggs one at a time until completely incorporated. 
  5. Add in your flour mix and your milk alternating, starting and ending with the flour. Only mix until just combine. 
  6. Add in your vanilla extract and mix until that is completely incorporated in the batter.
  7. Fold in your chocolate chips.
  8. Divide the batter evenly between the 12 liners and back for 18-20 minutes. Remove from the oven and allow to cool in the tin for 5 minutes then remove and completely cook on a wire rack.
Cookie Dough Filling

INGREDIENTS
2 tbsp unsalted butter at room temperature
3 tbsp packed light brown sugar
1/2 cup + 1 tbsp all purpose flour
3.5 oz sweetened condensed milk
1/4 tsp vanilla extract
1/8 cup semi sweet chocolate mini chips

DIRECTIONS
  1. Beat butter and sugar until light and fluffy. 
  2. Beat in the flour, vanilla and sweeten condensed milk until nice and smooth. 
  3. Fold in your chocolate mini chips.
This filling makes more than enough for your cupcakes. If you want to just keep some around for eating go ahead and make double.

Brown Sugar Buttercream

INGREDIENTS
1 1/2 sticks unsalted butter, at room tempurature
3/8 cup packed light brown sugar
1 1/4 cup powdered sugar
1/2 cup all purpose flour
1/4 + 1/8 tsp salt
1.5 tbsp whole milk
1 tsp + 1/4 tsp vanilla extract

DIRECTIONS


  1. Beat together the butter and sugar until light, fluffy and creamy.
  2. Mix in the powdered sugar until smooth.
  3. Mix in the salt and flour.
  4. Mix in the vanilla and milk. Beat until nice and smooth.
Putting them together

Once your cupcakes are cooled just use a melon baller of sorts to scoop out a bit of the middle of each cupcake. Fill the hole with the cookie dough. Pipe on your frosting and top with mini chips!!!!

Hot Fudge Sundae's

Well by golly. I'm finally updating. I'm actually going to do two posts today. This one and the cupcakes I'm currently baking. Anywho. This cupcake was absolutely fantastic. Actually to put it into the words of my roommate "Epic as F....!" I understand this is my blog and I'm sure I can type whatever I want...but I'm a classy girl...so I'll refrain from using the dirty words. :D

Anywho. I can't take credit for this delicious creation. I found it on www.gracessweetlife.com. She actually got the chocolate cake from Dhirardelli I think...and the frosting from Martha Stewart. It doesn't even mater where it came from. It's just flipping delicious!

Hot Fudge Sundae Cupcakes

Chocolate Cupcakes

INGREDIENTS
1 1/8 cup all-purpose flour
1 1/4 tsp baking soda
1/4 tsp salt
1/4 cup unsweetened cocoa powder
1 large egg
1/2 cup firmly packed light brown sugar
1/2 cup superfine granulated sugar
5/8 cup whole milk (the whole milk really does make a difference)
1/3 cup strong coffee
1 stick unsalted butter, melted

DIRECTIONS
  1. Preheat oven to 350F. Line your muffin tin like normal.
  2. Using a fine mesh sifter, sift the flour, baking soda and salt into a medium sized bowl. In a seperate bowl sift the cocoa powder 3 times (this really does matter so don't try the easy way out and not sift!). Add the sifted cocoa to the flour mixer and whisk it all together.
  3. In the bowl of a stand mixer, whisk together the egg and both sugars. Whisk in the milk, coffee and the melted butter. 
  4. Add the flour mix in to the egg mix in 3rds. Whisking until just combine. Do not over mix. 
  5. Divide your batter evenly among your liners and bake for 15-20 minutes. Remove from oven and let cook in the tin for 10 minutes. Remove and let cool completely on a wire rack.
Fluffy Vanilla Buttercream

INGREDIENTS
2 1/4 sticks unsalted butter
3 cups powdered sugar, sifted
1/2 tsp vanilla extract

DIRECTIONS
  1. In a stand mixer bowl beat the butter on medium-high until pale and creamy.
  2. Reduce the speed to medium and add in the powdered sugar 1/2 cup at a time. Scrap the sides down after each addition. After two additions increase speed to high for 10 seconds to fluff up the frosting. Return to medium speed and repeat until all the sugar is combine. 
  3. Add the vanilla and beat until the frosting is smooth.
Chocolate Ganache

INGREDIENTS
3 oz good quality semisweet chocolate, finely chopped
1/3 cup heavy cream
1/2 tbsp light corn syrup

DIRECTIONS
  1. In a heatproof bowl combine the chocolate, heavy cream and corn syrup.
  2. Heat in the microwave in 15 sec intervals until completely melted. Mix it all together until smooth.
Putting them all together!!


Frost  each cupcake generously with vanilla frosting. Drizzle with the ganache. Sprinkle with some fun colored sprinkles. Last but not least, top with a delicious cherry! YUMMMMM

Sunday, July 29, 2012

Peanut Butter Cup Cakes

Well once again I have gotten a little bit behind. I had intended to update this as soon as my cupcakes were done but once again homework gets in the way. I've finally managed to get my homework load back under control so I should be able to get back to normal. I plan on making a new cupcake tomorrow so I'll probably have another post up here soon.

This weeks cupcake was a chocolate cupcake with peanut butter buttercream. It turned our rather well if I do say so myself. I even took a few of them to school to get some opinions other than my boyfriend and the family. Everyone really enjoyed them and I even got offered money to make some for someone. The only thing I'm not too happy about is the chocolate cupcake part. Don't get me wrong, it tastes good. I just want to figure out the perfect chocolate cupcake recipe you know? So from here on out I'll be experimenting with chocolate cupcakes until I get what I consider to be the ultimate chocolate cupcake recipe.

Chocolate Cupcake
Yeilds: 12 cupcakes

INGREDIENTS
1 cup sugar
3/4 cup + 1/8 cup flour
1/4 cup + 1/8 cup unsweetened cocoa powder
1/2 tsp + 1/4 tsp baking powder
1/2 tsp + 1/4 tsp baking soda
1/2 tsp salt
1 egg
1/2 cup whole milk
1/4 cup vegetable oil
1 tsp vanilla extract
1/2 cup boiling water

DIRECTIONS

1.) Preheat your oven to 350F and line your muffin tin with liners.
2.) In the bowl of a stand mixer (if you don't have one don't worry it's okay, just use a large mixing bowl) mix together all the dry ingredients.
3.) Add in the egg, milk, oil and vanilla and beat on medium speed for about a minute.
4.) Mix in the boiling water. The batter is going to look really really thin and runny but it's the way its supposed to look so its okay.
5.) Fill your liners 2/3 full. Since the batter is so runny i just put it in a measuring cup and poured it instead of my normal ice cream scoop method.
6.) Bake cupcakes for 20-25 minutes. Allow to cool on a cooling rack.


Peanut Butter Buttercream Frosting

INGREDIENTS
1/2 cup unsalted butter
1/2 cup creamy peanut butter
2 cups powdered sugar
about 1/8 cup milk
1/2 tsp vanilla extract

1.) Beat together the butter,salt, peanut butter and vanilla until nice and smooth.
2.) Slowly add in the powdered sugar.
3.) If the frosting gets too thick add in the milk as needed to make it a spreadable consistency.


Put your cupcakes together and garnish with mini peanut butter cups! Enjoy!!!

Sunday, July 22, 2012

Nutella Love

     Well once again I have been slacking in the blog posts. On the plus side I have officially survived my fist two weeks of college. Let me tell you, I will never underestimate Chef's ever again. They work incredibly hard. After my first culinary class I thought that I was going to die. I'm not in school for culinary arts by the way...just in case any of you wanted to know... I'm actually in school for baking and pastry buuuuttt half of my classes are actually regular cooking classes. It's certainly a great learning experience though so I don't mind. Have you ever whisked mayonnaise by hand? Because I did in school this week and I highly DON'T recommend it...unless you enjoy the "my arm is going to fall off" felling. :D

      Anyway onto the baking of the week. This was actually 2 weeks ago I believe. I have the pleasure of being in a foodie club where my friend Kira posts 7 recipes and we all pick from one and make it ourselves. This week I actually had to make smore's cupcakes for my sister going away party...and they turned out AWESOME. I'm rambling again. Onto the muffin!!

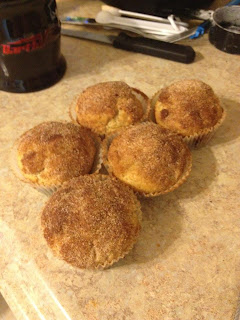
 Nutella Stuffed Cinnamon Sugar Muffins 
Recipe addapted from sallysbakingaddiction.com

INGREDIENTS
1/3 cup unsalted butter, room temp
1/2 cup sugar
1 egg
1 tsp vanilla extract
1/2 cup milk
1&1/2 cup all purpose flour
1&1/2 tsp baking powder
1/2 tsp cinnamon
1/2 tsp nutmeg
1/2 tsp salt
16 tsp Nutella

FOR THE TOPPING
1/4 cup sugar
2 tsp cinnamon
3 tbsp unsalted butter

Directions
  1. Preheat your oven to 425F. Spray your muffin tin and set it aside. Once again I always use liners because its easier to clean and it looks nice.
  2. In a medium bowl mix together your flour, baking powder, cinnamon, nutmeg and salt.
  3. In a large mixer bowl cream together you sugar and butter. Mix in your vanilla, milk and egg.
  4.  Slowly and gently mix in your flour mixture until just combined. You don't want to over mix
  5. Fill the bottom of your muffin tins with about 1 tbsp of mix. Then place 2 tsp of nutella on top of the mix. Top the nutella with the rest of your muffing mix. You should have about 8-9 muffins so do not freak out that it doesn't look like a lot of batter.
  6. Place in the oven and bake for 5 minutes and then lower the oven temp to 350 and bake the rest of the way. 12-17 minutes.
  7. Allow the muffins to cool for about 5 minutes before putting on the topping.
  8. For the topping melt your butter in the microwave. In a bowl mix together the cinnamon and sugar. Brush the butter on top of each muffin and then dunk the top of the muffin into the cinnamon sugar mixture.
      That is all there is to it. It was a prefect little breakfast muffin and I hope those of you that look at it will be encouraged to try it. 


     This week once my school load is lightened I'll be practicing my cupcake skills paired with buttercream icing. I need to prefect it before I go and visit my Aunt Virginia who I haven't seen in years! She's a big buttercream lover so I don't want to let her down. Which means I will be putting buttercream on everything until it get it perfect!

Monday, July 9, 2012

Pumpkin Chip Muffins

This was not at all what I intended to back this week. I was actually planning on perfecting my red velvet cupcakes. Maybe I'll still get around to it but I'm not sure. I start school this week so I'm pretty sure my week is going to be very very busy. This whole school thing is actually what started the muffin light bulb in my head. I normally wake up every morning and make Mark breakfast before he goes to work since it's my job as house woman (that's the title I gave myself since we aren't married). Sooooo I thought I'd just make something that he can grab on his way out the door since I'll be gone an hour before he even needs to wake up.


I had good intentions at first....and then while I was at the grocery store I had this ridiculous craving for pumpkin....Luckily for me Mark actually likes pumpkin! Alright! Enough about my day and more about this tasty tasty cupcake


Pumpkin Chip Muffins
Yields: about 16 muffins


INGREDIENTS
1 1/2 cup flour
3/4 cup sugar
1 tsp baking powder
1 tsp baking soda
1 tsp pumpkin pie spice
1/8 tsp fine salt
2 large eggs
1/4 cup nonfat milk
1/3 cup nonfat Greek yogurt
1/2 vegetable oil
1 can (15 oz) pumpkin puree
1 cup semi sweet chocolate chips (you can use whatever chips you like...white...dark...milk...)

DIRECTIONS

1.) Preheat the oven to 400F. Line your muffin tin. You could just spray the pan with non stick spray if you'd like but I like liners. I think they're nice to look at.

2.) In a large bowl ( I used my stand mixer bowl) mix together the flour, sugar, baking powder, baking soda, pumpkin pie spice and salt. Set aside.

3.) In a medium size bowl mix together the eggs, milk, yogurt, vegetable oil and pumpkin puree.

4.) Mix together the wet and dry ingredients until they are nicely combined. Mix in half of the chocolate chips.

5.) Fill up your liners and pop those babies into the oven. It should take 15-20 minutes for them to finish up.

Enjoy (^_^)

Friday, July 6, 2012

Cookies N' Cream

Hello again! This weeks cupcake is as the title says. Cookies N' Cream. This is probably the easiest cupcake that I've made so far. This cupcake also seems to be my families favorite so far. Anyway, enough rambling here. Let me get to the cupcake.

Cookies N' Cream Cupcake
Yields: 12 cupcakes     Active Time: 25 mins      Total Time: 1 hr 55 mins

Ingredients
1 1/2 cups all-purpose flour
1 1/2 tsp baking powder
1/4 tsp fine salt
2 large eggs at room temperature
2/3 cup granulated sugar
1 1/2 sticks unsalted butter, melted
2 tsp vanilla extract
1/2 cup milk
12 sandwich cookies (I obviously used oreo's)

Directions

1.) Preheat your oven to 350F. Line your standard cupcake tin with cupcake liners. You're going to take your sandwich cookies now and separate the tops from the bottoms. One half will have the cream still attached to it. Take the half with the cream still attached and place them into the bottom of each cupcake liner.

2.) Take the other pieces of cookie and go ahead and chop those up in a food processor....and if you're like me and can't afford a nice food processor just put them in a plastic baggy and have some fun with a rolling pin.

3.) In a medium sized bowl mix together your flour, baking powder and salt. Set that aside.

4.) In a stand-mixer bowl (or just a regular large bowl if you don't have a mixer) beat together the sugar and the eggs until it's light and foamy.While beating this slowly add in the vanilla and the melted butter.

5.) Slow down your mixer and slowly start adding in the flour mixture. You're going to add it in three parts alternating between the flour and the milk. Starting and ending with the flour. Once that is all incorporated throw in your processed cookies until just combined.

6.) Go ahead and fill your cupcake tin and pop them in the oven. It should take about 20 minutes for them to bake. Half way through baking make sure to turn your tin so that you can insure that the cupcakes are evenly baked.

Cookies N' Cream Buttercream Frosting

Ingredients
2 sticks salted butter at room temperature
1/8 cup heavy whipping cream
1 tsp vanilla extract
4 cups powdered sugar
8 sandwich cookies


Directions

1.) Throw your cookies (the whole cookie, not just tops or bottoms) into a food processor and blend them up until they are nice and fine. I once again didn't have a food processor which made my icing a little bit too chunky to pipe onto my cupcakes. It is still tasty if not piped.

2.) Mix together the butter, vanilla and cream until nice and smooth. Slowly add in your powdered sugar a little at a time.

3.) Once all that is nice and mixed together go ahead and throw in those delicious cookie crumbs and mix until combined.


That's all there is to it. Decorate your cupcakes however you'd like. I used mini sandwich cookies. I'm not sure what I'll be dabbling into next week but hopefully it is as delicious as this one turned out to be!

Tuesday, June 26, 2012

Sweet Like A Chica Cherry Cola

Hello again. I'm finally sitting down and updating again. I really have been slacking off lately but I've finally managed to keep myself busy enough where I can't sit at my computer all day. Between making breakfast every morning, cleaning during the day and making dinner at night I've managed to keep myself incredibly occupied. Hopefully I can keep it all up once my schooling starts next week.

So on to this delicious cupcake. I've adapted this recipe a little bit from the cupcakeproject. Her recipe was divine! Seriously. I just wanted a little extra cola taste and a little bit less of the cherries that the original recipe called for.

Cherry Coke Cupcakes
Yields: 12 cupcakes


INGREDIENTS
1 cup cola ( I used coca-cola. I don't really think it matters what brand you use I just used it because that is what was at our house.)
1 tsp apple cider vinegar
3/4 cup granulated sugar
1/3 cup canola oil
2 tsp cola extract ( This is the stuff that you make homemade soda with. I found some on amazon.)
1 1/3 cups flour
3/4 tsp baking soda
1/2 tsp baking powder
36 maraschino cherries

 DIRECTIONS

1.) In a medium sized bowl mix together the apple cider vinegar and the cola. Allow that to sit for a few minutes
2.) Mix in the sugar and the oil. Mix it really well until it is a bit frosty!
3.) Mix in the cola extract, flour, baking powder and baking soda until just combined.
4.) Fill your cupcake liners 3/4 of the way full.
5.) Now it's time to add your cherries. I put two cherries into each cupcake. I cut them each in half though and put them evenly in each cupcake.
6.) Bake at 350F until cooked all the way through and they bounce back when you touch them. This takes about 20 minutes.

Cola Frosting

INGREDIENTS

8 oz cream cheese
2.5 - 3 tsp of cola extract (This depends on what you want it to taste like. I started with 2 and tasted it and ended up adding about 3)
1/4 cup unsalted butter
2 cups powdered sugar

DIRECTIONS

1.) Beat together the butter and the cream cheese.
2.) Add in the powdered sugar. You can always add in more sugar if you like a more sugar flavored frosting as opposed to cream cheese. It makes it a bit thicker also.
3.) Add in the extract.

Put your cupcakes all together and enjoy. I used the extra cherries to a garnish and I also added some red edible glitter. I thought it made them look fancy :D


Tuesday, June 12, 2012

Chocolate Cupcakes with Salted Caramel Cream Cheese Buttercream Frosting

Well, it has been a bit since I have updated this blog. I didn't mean to get so far behind so I would like to apologize to everyone who actually reads this. Anywho. On to the cupcake. This was actually last weeks cupcake so I\'ll have another post sometime later this week hopefully


Chocolate cupcakes with salted caramel cream cheese butter cream frosting. Now isn't that a mouth full? A tasty mouth full that is. Now, first things first. You're going to need to make some salted caramel. It might seem like a hard task but let me tell you. It was pretty darn easy.

Salted Caramel Sauce

INGREDIENTS
1 cup granulated sugar
6 tbsp unsalted butter at room temperature
1/2 cup heavy cream
1/2 tbsp sea salt

1.) First thing you're going to want to do is get a pot that is a bit bigger than you'll think you need. When you add some of the ingredients it will bubble up like crazy and I\'m sure y'all don't want to get hurt.
2.) Add your 1 cup of sugar to your pot in an even layer. Heat it over medium-high heat and whisk it while it melts. The sugar is going to start to clump up but it will even out and completely melt.
3.) Once it's completely melted you can stop whisking. You'll just want to swirl the pan around every once in a while. Continue to cook the caramel until it reaches a deep amber color. If you have a candy thermometer you'll want it to reach 350F.
4.) Once you reach this temperature you'll want to add the butter all at once. Be careful because the caramel is going to bubble like crazy. Whisk the butter in until is it completely melted.
5.) Remove the pan from the heat and slowly add the cream. Once again it's going to bubble up so be careful. Whisk it until you have a nice smooth mixture and then add the sea salt.
6.) Allow the caramel to cool to room temperature before using. Store it in an air tight container. You can store it in the fridge for up to two weeks. Just make sure to reheat it.

This makes one cup of salted caramel. Double it to increase the amount.

Chocolate Salted Caramel Cupcakes

INGREDIENTS 
1/4 cup plus 1/2 tbsp of dutch processed cocoa
1/4 cup plus 1/2 tbsp of hot water
1 1/4 tsp plus 1/2 of 1/4 a tsp of baking soda ( I know that sounds a bit confusing but I adapted the recipe to only make 12 cupcakes. I find that making 24 at a time they never all get eaten)
1 1/4 tsp plus 1/2 of 1/4 a tsp of baking powder
1/4 tsp of salt
1/2 cup plus 1/2 tbsp butter (unsalted), room temperature
1 1/2 cup and 1 1/3 cup of granulated sugar
1.5 eggs (what I did was I scrambled up one of the eggs and just used half of it)
1/2 tbsp vanilla extract
1 1/4 cup plus 1/2 of 1/4 cup sour cream

Salted Caramel Frosting

INGREDIENTS
1/2 cup unsalted butter
4 oz softened cream cheese, at room temperature
1/4 cup salted caramel sauce
2 cups powdered sugar

Prep time: 30 minutes        Bake Time: 20 minutes        Yields: 12 cupcakes

Directions

1.) Preheat the oven to 350F. Line your standard muffin tin with paper liners. I like to spray my liners with non-stick cooking spray. It makes the cupcakes not stick to the liners so they look really pretty when you take the wrapper off.
2.) In a small bowl mix together the cocoa and the hot water. Keep on stirring it until is it all mixed together and makes a smooth mixture.
3.) In another medium size bowl mix together your flour, baking soda, baking powder and salt.
4.) Combine your butter and sugar in a sauce pan over medium heat stirring every once in a while until the mixture is completely melted. Put the mixture in a mixer bowl and beat on medium-low heat until it is cooled. This takes about 4-5 minutes.
5.) Add in the eggs one at a time and mix until incorporated. Add in the vanilla and then the cocoa mixture. Beat until nice and smooth.
6.) Reduce the mixer speed to low and add the flour and sour cream alternating between the two beginning and ending with the flour. Mix in until it is just incorporated.
7.) Divide the batter into you cupcake liners. I like to use an ice cream scoop to do this. It makes sure all my cupcakes are the same size. Bake until a toothpick comes out clean. Also, rotate your pan about half way through so that they have even baking.

Frosting Directions

1.) Beat together the butter and the cream cheese on medium high speed for about 5 minutes.
2.) Add in the salted caramel sauce.
3.) Reduce the speed to medium low and add in your powdered sugar bit by bit. Increase speed to medium high and beat until the frosting is light and fluffy!!!

Decorate however you like. I piped on my frosting but you don't need to :). I also added some edible glitter stars because I thought they looked super neat. Oh yea...and drizzle on some extra caramel sauce because it is DELICIOUS!

This recipe was adapted from the browneyedbaker

Wednesday, May 23, 2012

It's Peanut Butter Jelly Time

 Well, I finally managed to pull myself away from the VA hospital yesterday. It wasn't nearly as bad as I had expected it to be. All of the people there were incredibly nice. Anyway, enough about that, onto the cupcake. This week I decided to make PB and J cupcakes. They turned out delightful. At first I was a little skeptical. The recipe was quite a bit easier than the recipes used for the previous cupcakes I've made so far. I think that this cupcake would be a great one to make with your children if you have them. It's just a wonderful take on a PB&J sandwich. I hope you all enjoy :)

MAKES: 12 cupcakes     ACTIVE TIME: 20 minutes     TOTAL TIME: 1 hour 55 minutes

Ingredients
Baking spray with flour
1 1/2 cups all-purpose flours
1 teaspoon baking powder
1/2 teaspoon fine salt
1 stick (4 ounces) unsalted butter, at room temperature
1 cup granulated sugar
2 large eggs plus 1 egg yolk
2 teaspoons pure vanilla extract
3/4 cup milk
1 cup grape jelly (or whichever jelly you prefer)
 Peanut Butter Frosting, recipe to follow
Candy bars, crushed with a rolling pin (Reese's Pieces, Butterfinger, Nutter Butter, Heath Bar or small sandwich cookies) for decoration

Directions 

Preheat the oven to 350F. Line one 12 cup standard muffin pan with cupcake liners. Gently spray the liners with baking spray and set aside.

Sift the flour, baking powder and salt over a large piece of paper. In a large bowl, cream the butter and granulated sugar with a hand mixer on medium speed until light and fluffy. Beat in the eggs, egg yolk and vanilla. Reduce the speed to low and scrape down the sides of the bowl. Pour in the milk and continue to mix until smooth (the batter will look curdled at first but it will eventually smooth out). Pick up the paper and gradually pour into the wet ingredients. Continue to mix until just blended.

Spoon the batter evenly into the muffin tin, filling each cup about three-quarters full. Bake until the tops of the cupcakes spring back to the touch and are not too golden, about 20 minutes. Cool in the tin for 15 minutes, and then allow to cool completely on a wire rack before filling, frosting or decorating. 

Fill a squeeze bottle with the grape jelly and screw on the cap. Carefully insert the tip of the bottle as far as it will go into the tops of the cupcakes. Gently squeeze about  1 tablespoon jelly inside of each cupcake. Ice the tops of the cupcakes with Peanut Butter Frosting to cover. Decorate with your favorite candy.

Peanut Butter Frosting
1/2 cup smooth peanut butter
4 tablespoons unsalted butter, at room temperature
4 ounces cream cheese, at room temperature 
2 cups confectioners' sugar
1 1/2 teaspoon milk

Beat the peanut butter, butter and cream cheese with a hand or stand mixer on medium speed until fluffy. Slowly add the confectioners' sugar and continue to mix until frosting is smooth. Mix in the milk and continue to mix until it reaches a good spreading consistency. 

That's all there is to it. I decided not to top my cupcakes with anything. I had a taste of the frosting before I topped all the cupcakes and I thought that the frosting was perfectly fine on its own. So, my only suggestion to you is to give it a try by itself and see if you still want to add the extra goodies. Enjoy!!!

Recipe courtesy Tyler Florence

Don't forget to come back next week. I'll be making Black Velvet Cupcakes with a Red White Chocolate Swiss Buttercream Frosting for Marks birthday.

Tuesday, May 22, 2012

Today is the day

Well. It's Tuesday again. Tuesday is my baking day. That means that shortly after I manage to navigate my way in and out of the VA hospital I will be headed off to the grocery. I've got a list of delicious ingredients that I need to pick up for today's scrumptious treat! I'll write more in a bit and let you know all about this weeks cupcake. Until then, stay sweet <3

Wednesday, May 16, 2012

Cinnamon Swirl Breakfast Cupcakes with Bacon!


So it has come to my attention that pretty much everyone thinks that bacon is the most amazing thing on the planet. Unless of course, you're like me, a vegetarian. Cooking the bacon in this recipe was probably the hardest part for me. I can't vouch for how delicious they are with the bacon on them but I can say these babies were pretty tasty without it! According to my family and my boyfriend (they are the ones that get force feed all of my creations since I don't have a division of boys to force them on anymore) they turned out pretty darn tasty!

MAKES: 24 cupcakes ACTIVE TIME: 45 minutes TOTAL TIME: 2 hours 15 minutes

Ingredients
1 1/2 cup all-purpose flour
1 teaspoon baking powder
1 teaspoon baking soda
1/4 teaspoon fine salt
2 sticks (8 ounces) salted butter, at room temperature
1 cup granulated sugar
1 teaspoon vanilla extract
2 eggs
1 1/4 cups sour cream
1/2 cup light brown sugar, loosely packed
1 tablespoon ground cinnamon
Maple Cream Cheese Frosting (recipe to follow)
Maple-glazed bacon (recipe to follow)
1 cup fresh strawberries, hulled and diced for garnish
Maple syrup, for drizzling

Directions
 
Preheat the oven to 325F. Line 2 standard 12 cup muffin pans with your cupcake liners.
Sift the flour, baking powder, baking soda and salt into a medium bowl. Set the bowl to the side.

In the bowl of a stand mixer fitted with the paddle attachment, cream the butter and granulated sugar together, about 5 minutes. Scrape the sides and then add the vanilla and 1 egg at a time. Scrape the sides of the bowl after each addition. Turn the mixer to the lowest speed and add the flour mixture and sour cream, alternation between the two, starting and ending with the flour.

In a separate bowl mix together the cinnamon and brown sugar and then fold it into the batter by hand. You don't want this to be completely mixed in. It should be swirly. 

Fill the cupcake liners half full with the batter and bake until golden brown and cooked all the way through, about 30 minutes (once again this is oven dependent). Cool the cupcakes completely

Maple Cream Cheese Frosting
 1 lb cream cheese
2 tablespoons maple syrup

Okay. So here is the deal with this part. The above ingredients are what the recipe called for. For me it was way too much cream cheese and not enough sweet. So, I kind of just did my own thing after following the directions.

Whip the cream cheese and syrup in the bowl of a stand mixer fitted with a whisk attachment until fluffy.

I did that and then I tasted it and I wasn't very happy with the outcome so considering I still had brown sugar, granulated sugar and maple syrup next to me I just started adding things in until I thought I tasted delicious. The majority of the extra things that I added was syrup and brown sugar. I'm sorry I can't give the exact measurements. I just put it it until I liked it so my suggestion to you would be to do the same. Who knows. You may like it the way it's supposed to be made originally.

Maple Glazed Bacon
1 12 ounce package of bacon
1/4 cup of Maple syrup
olive oil cooking spray
 
Coat 2 nonstick skillets with the cooking spray. Cook the bacon over medium heat, turning once, making sure the bacon is cooked all the way. Turn the heat down and divide the maple syrup between the two skillets, drizzling on the bacon. Continue to cook turning the bacon often and watching closely so that the syrup does not burn. You want the bacon to be coated with the syrup and caramelized, but NOT soggy. Let it cool and then chop it up.

Putting it all together!!!

Generously frost the top of each cupcake. Sprinkle with the bacon and diced strawberries (I skipped the strawberries, my boyfriend hates them) evenly over the frosting. Drizzle with maple syrup before serving.

I want to thank Holly Wilder for the recipe. She was on Cupcake Wars. Woo Hoo!

That is it for today. Don't forget to come back next week for my next cupcake!

S'mores Cupcakes


Welcome to my cupcake blog! Since this is my post I'll start off with a little bit of information about myself. I'm just your average 24 year old girl that likes to bake. I'm not an expert but maybe one day I will be. This blog is just to share some of the creations I have made and how you can make them yourself. I hope you all enjoy it!

I'm going to start off with the first cupcake I made. By first cupcake I mean the first cupcake that I made completely from scratch.


The recipe I used for this amazing cupcake is from Food Network Kitchens. I actually got it off of the cupcake app for my Ipad.

MAKES: 12 cupcakes ACTIVE TIME: 35 minutes TOTAL TIME: 2 hours

Ingredients

 Cupcakes:
3/4 cup all-purpose flour
3/4 cup finely ground graham crackers
1 1/4 teaspoon baking powder
1/2 teaspoon fine salt
1 1/2 sticks (6oz) unsalted butter, at room temperature
1/2 cup packed light brown sugar
2 large eggs
1 teaspoon vanilla extract
2/3 cup milk

Filling:
 8 ounces bittersweet chocolate, chopped (milk chocolate can be used if you aren't a big fan of bittersweet)
1/3 cup heavy cream
1 tablespoon light corn syrup

Meringue Frosting:
 4 egg whites, at room temperature
2/3 cup granulated sugar
1/8 teaspoon cream of tartar
1 teaspoon vanilla extract
Chocolate squares, for garnish

Directions

Cupcakes

 preheat oven to 350F. Line your cupcake pan with 12 cupcake liners

In a small bowl, whisk the flour, baking powder, salt and ground graham crackers together.

In a stand mixer with the paddle attachment, beat together the butter and brown sugar on medium speed until combined. Then increase the speed to medium high and continue to beat. Don't forget to take a few breaks to wipe down the sides of the bowl. Continue beating until light and fluffy (3-5 minutes). Add the eggs and vanilla and beat until they combined. Add the flour mixture and the milk, alternating, starting and ending with the flour mixture, until just combined.

Divide the batter evenly between the cupcakes liners. Each one should be about 2/3 full. Bake them until they are golden brown or until a toothpick comes out clean after being inserted into the center. It's about 25 minutes but it is always subject to change depending on your oven (mint took about 20 minutes). Let cool in the pan for 5 minutes and then remove the cupcakes and let them cool completely on a wire rack.

FillingWhile the cupcakes are cooling, prepare the filling. Combine the chocolate and cream and corn syrup into a medium bowl and microwave at 30 second intervals on high, stirring, until smooth. Allow it to set until cooled and slightly thickened. About 30 minutes

Meringue Frosting

Bring 1 inch of water to a simmer in a saucepan that will fit your heatproof stand mixers bowl above the water. Combine the egg whites, granulated sugar and cream of tartar in the mixer bowl. Set the bowl above the water and whisk until the sugar is dissolved and the egg whites are white, starting to get fluffy and warm to the touch. Move the bowl over to the mixer with a whisk attachment, and whip on high speed until the meringue is cooled, fluffy and thick. Beat in the vanilla

Putting Them Together!
Put the chocolate filling into a pastry bag that has round tip (about 1/8 inch diameter). Pierce the center of each cupcake with the tip and gently squeeze in the filling until it gently comes out of the top. Repeat with all cupcakes.

Pipe or swirl the frosting onto each cupcake. If you want that nice golden brown look you could use a kitchen torch but for those of you who don't have one of those (like myself) the broiler works just fine. Place them under the broiler just for a few seconds until you get the color you desire. Garnish with your chocolate square and enjoy!!!

This recipe was truly fun to make. I enjoyed ever minute of it and they really were delicious! I hope you all love them just as much as I do.